Runbooks
Runbooks are a collection of documented procedures that explain how to carry out a particular process, be it starting, stopping, debugging, or troubleshooting a particular system.
Using Jupyter Notebooks and the Rubix library, users can get started writing their own executable runbooks.
Overview
Historically, runbooks took the form of a decision tree or a detailed step-by-step guide depending on the condition or system.
Modern implementations have introduced the concept of an "executable runbooks", where, along with a well-defined process, operators can execute pre-written code blocks or database queries against a given environment.
Executable Runbooks
Introduced in GitLab 11.4.
The JupyterHub app offered via GitLab’s Kubernetes integration now ships with Nurtch’s Rubix library, providing a simple way to create DevOps runbooks. A sample runbook is provided, showcasing common operations. While Rubix makes it simple to create common Kubernetes and AWS workflows, you can also create them manually without Rubix.
Watch this video for an overview of how this is accomplished in GitLab!
Requirements
To create an executable runbook, you will need:
- Kubernetes - A Kubernetes cluster is required to deploy the rest of the applications. The simplest way to get started is to add a cluster using one of GitLab's integrations.
- Helm Tiller - Helm is a package manager for Kubernetes and is required to install all the other applications. It is installed in its own pod inside the cluster which can run the Helm CLI in a safe environment.
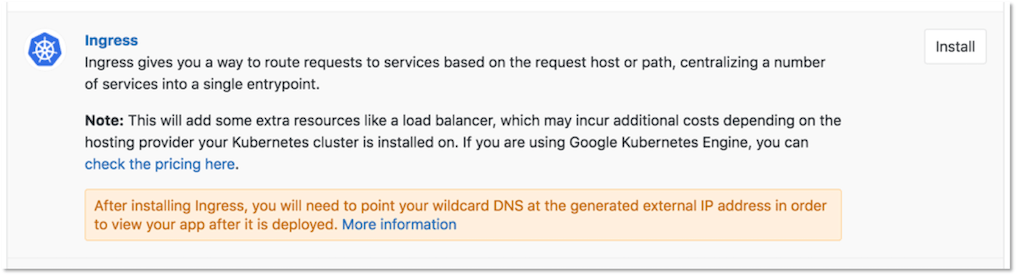
- Ingress - Ingress can provide load balancing, SSL termination, and name-based virtual hosting. It acts as a web proxy for your applications.
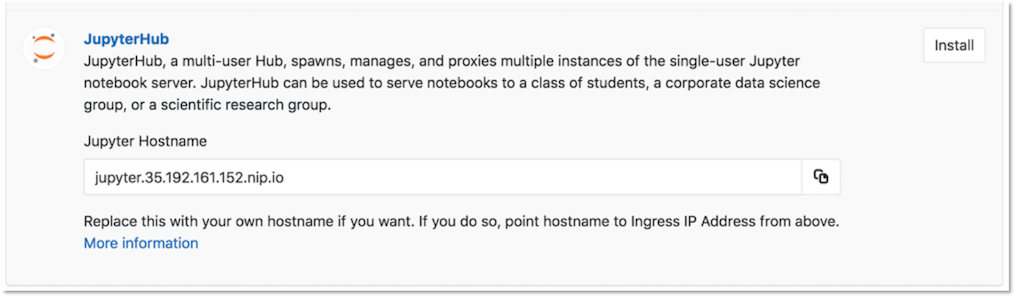
- JupyterHub - JupyterHub is a multi-user service for managing notebooks across a team. Jupyter Notebooks provide a web-based interactive programming environment used for data analysis, visualization, and machine learning.
Nurtch
Nurtch is the company behind the Rubix library. Rubix is an open-source Python library that makes it easy to perform common DevOps tasks inside Jupyter Notebooks. Tasks such as plotting Cloudwatch metrics and rolling your ECS/Kubernetes app are simplified down to a couple of lines of code. See the Nurtch Documentation for more information.
Configure an executable runbook with GitLab
Follow this step-by-step guide to configure an executable runbook in GitLab using the components outlined above and the preloaded demo runbook.
1. Add a Kubernetes cluster
Follow the steps outlined in Add new cluster to add a Kubernetes cluster to your project.
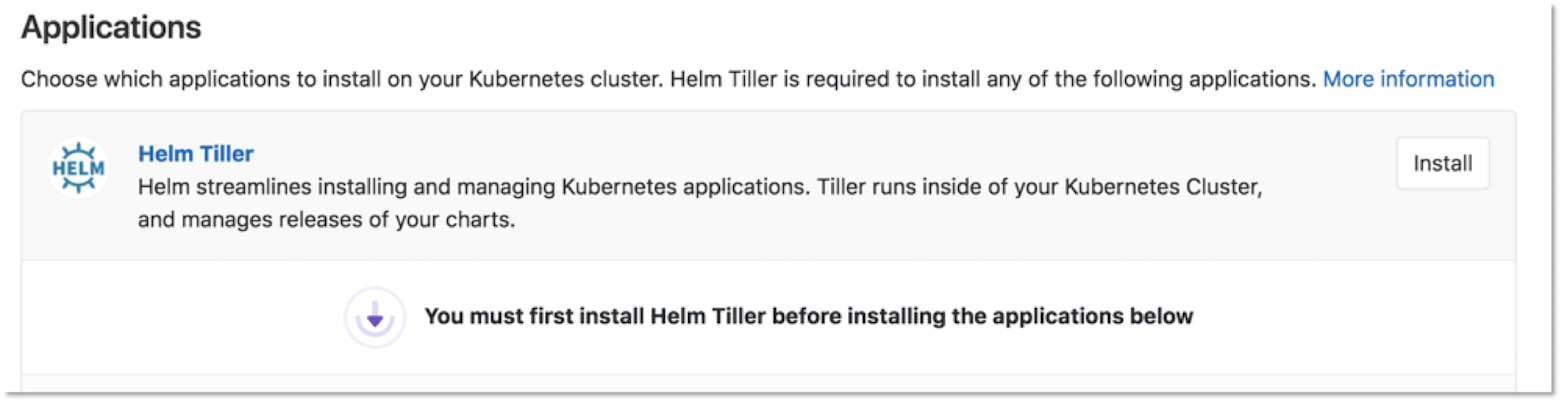
2. Install Helm Tiller, Ingress, and JupyterHub
Once the cluster has been provisioned in GKE, click the Install button next to the Helm Tiller app.
Once Tiller has been installed successfully, click the Install button next to the Ingress app.
Once Ingress has been installed successfully, click the Install button next to the JupyterHub app.
3. Login to JupyterHub and start the server
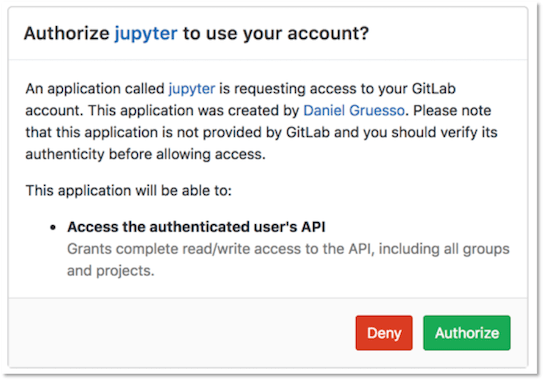
Once JupyterHub has been installed successfully, navigate to the displayed Jupyter Hostname URL and click Sign in with GitLab. Authentication is automatically enabled for any user of the GitLab instance via OAuth2. This will redirect to GitLab in order to authorize JupyterHub to use your GitLab account. Click Authorize.
Once the application has been authorized you will taken back to the JupyterHub application. Click Start My Server. The server will take a couple of seconds to start.
4. Configure access
In order for the runbook to access your GitLab project, you will need to enter a GitLab Access Token as well as your Project ID in the Setup section of the demo runbook.
Double-click the DevOps-Runbook-Demo folder located on the left panel.
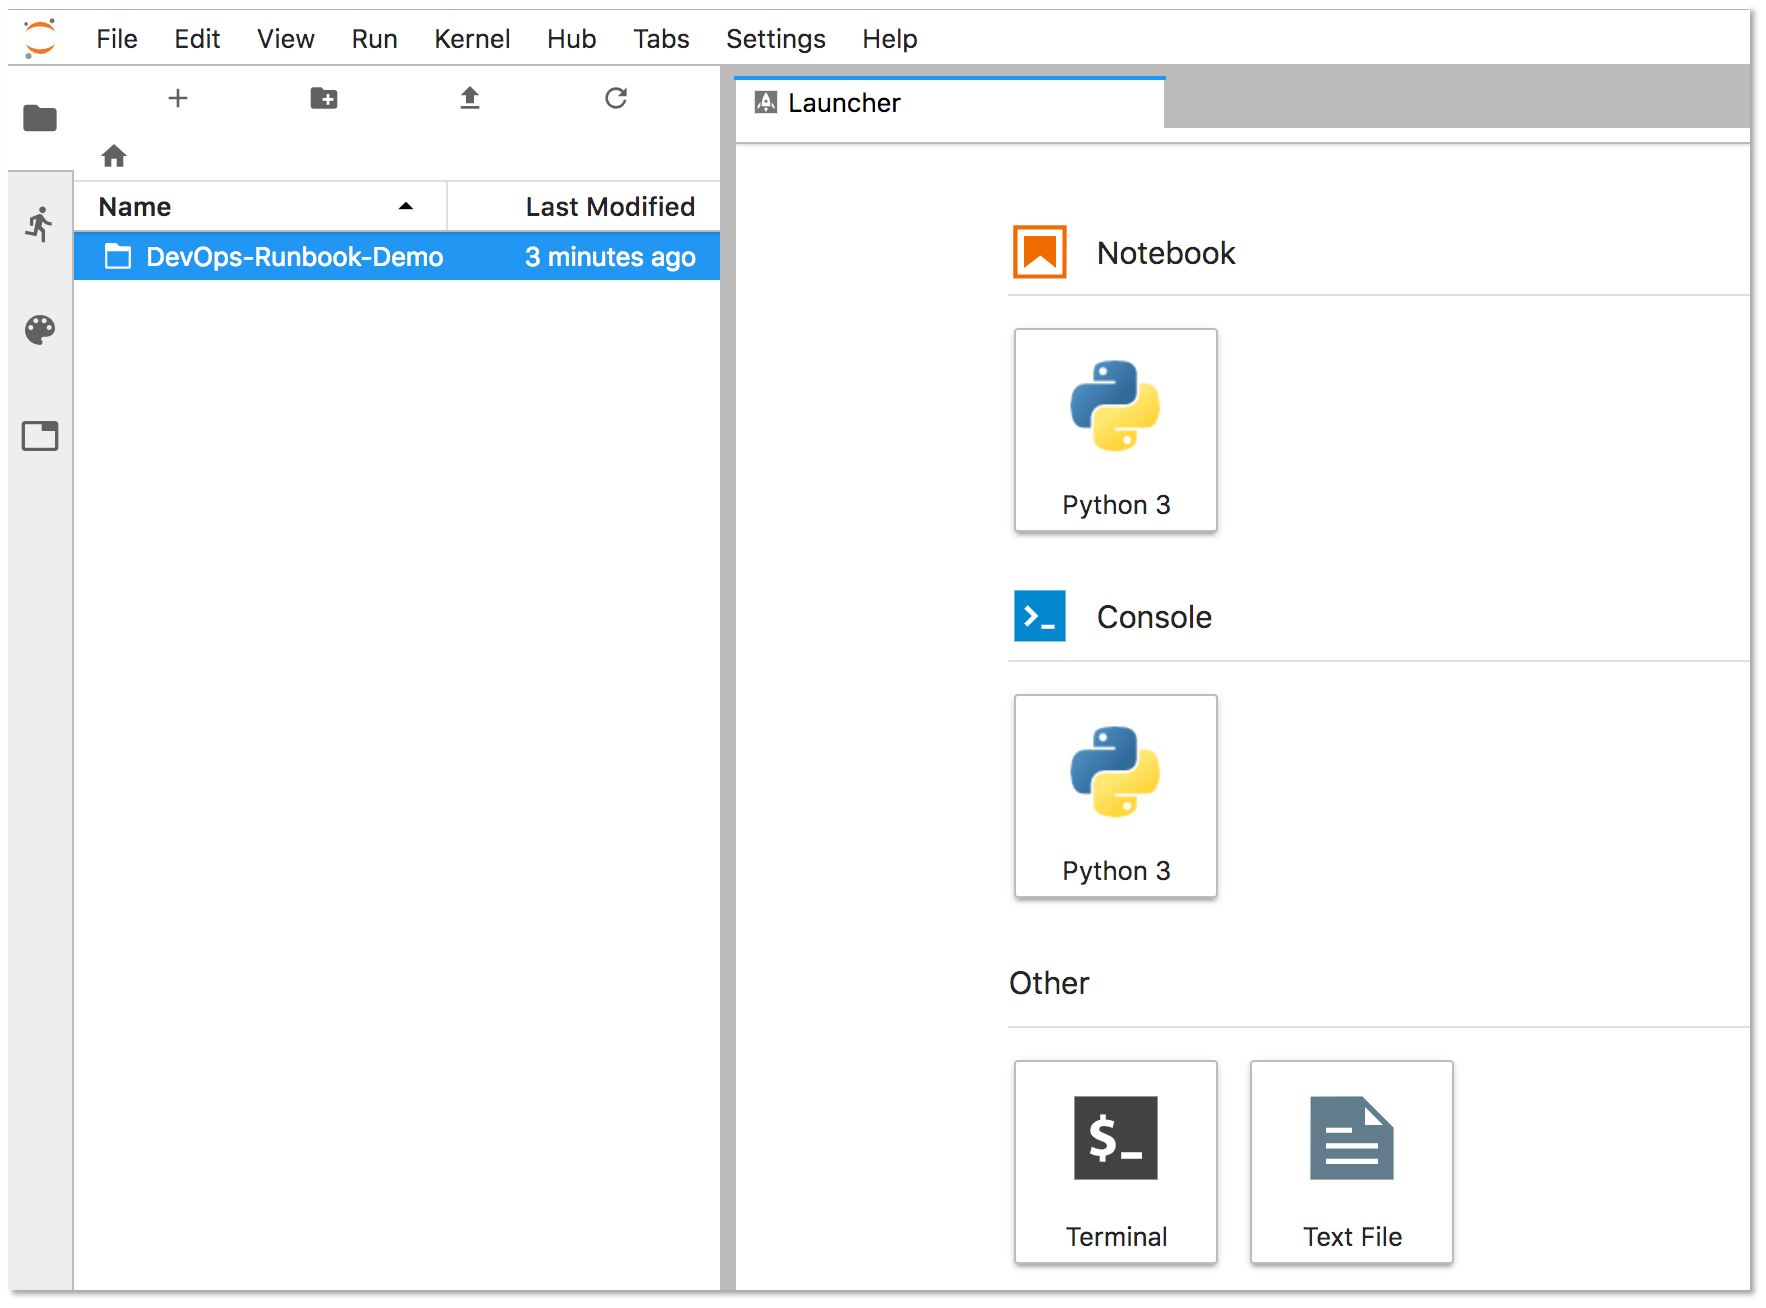
Double-click the "Nurtch-DevOps-Demo.ipynb" runbook.

The contents on the runbook will be displayed on the right side of the screen. Under the "Setup" section, you will find
entries for both your PRIVATE_TOKEN and your PROJECT_ID. Enter both these values, conserving the single quotes as follows:
PRIVATE_TOKEN = 'n671WNGecHugsdEDPsyo'
PROJECT_ID = '1234567'
Update the VARIABLE_NAME on the last line of this section to match the name of the variable you are using for your
access token. In this example our variable name is PRIVATE_TOKEN.
VARIABLE_VALUE = project.variables.get('PRIVATE_TOKEN').value5. Configure an operation
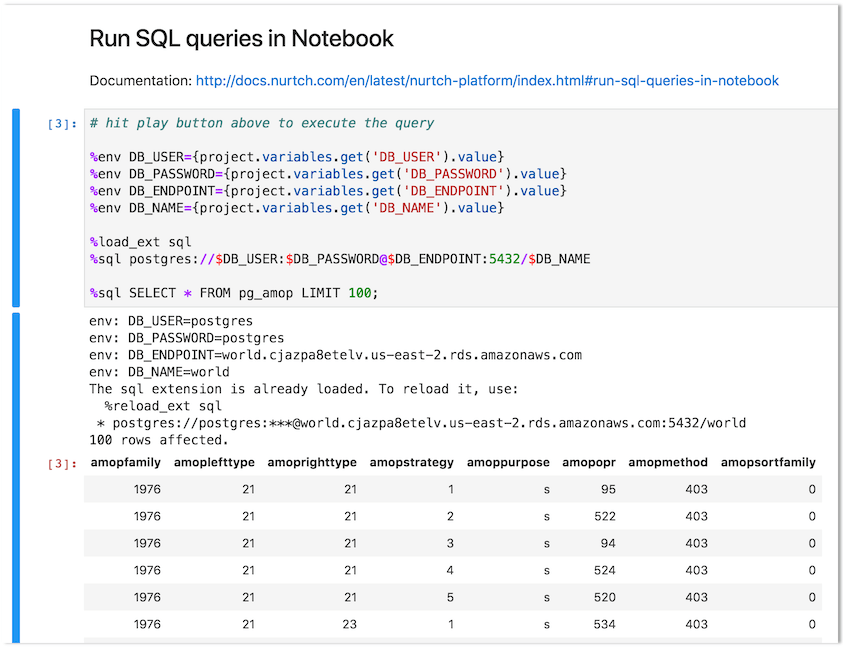
For this example we'll use the "Run SQL queries in Notebook" section in the sample runbook to query a postgres database. The first 4 lines of the section define the variables that are required for this query to function.
%env DB_USER={project.variables.get('DB_USER').value}
%env DB_PASSWORD={project.variables.get('DB_PASSWORD').value}
%env DB_ENDPOINT={project.variables.get('DB_ENDPOINT').value}
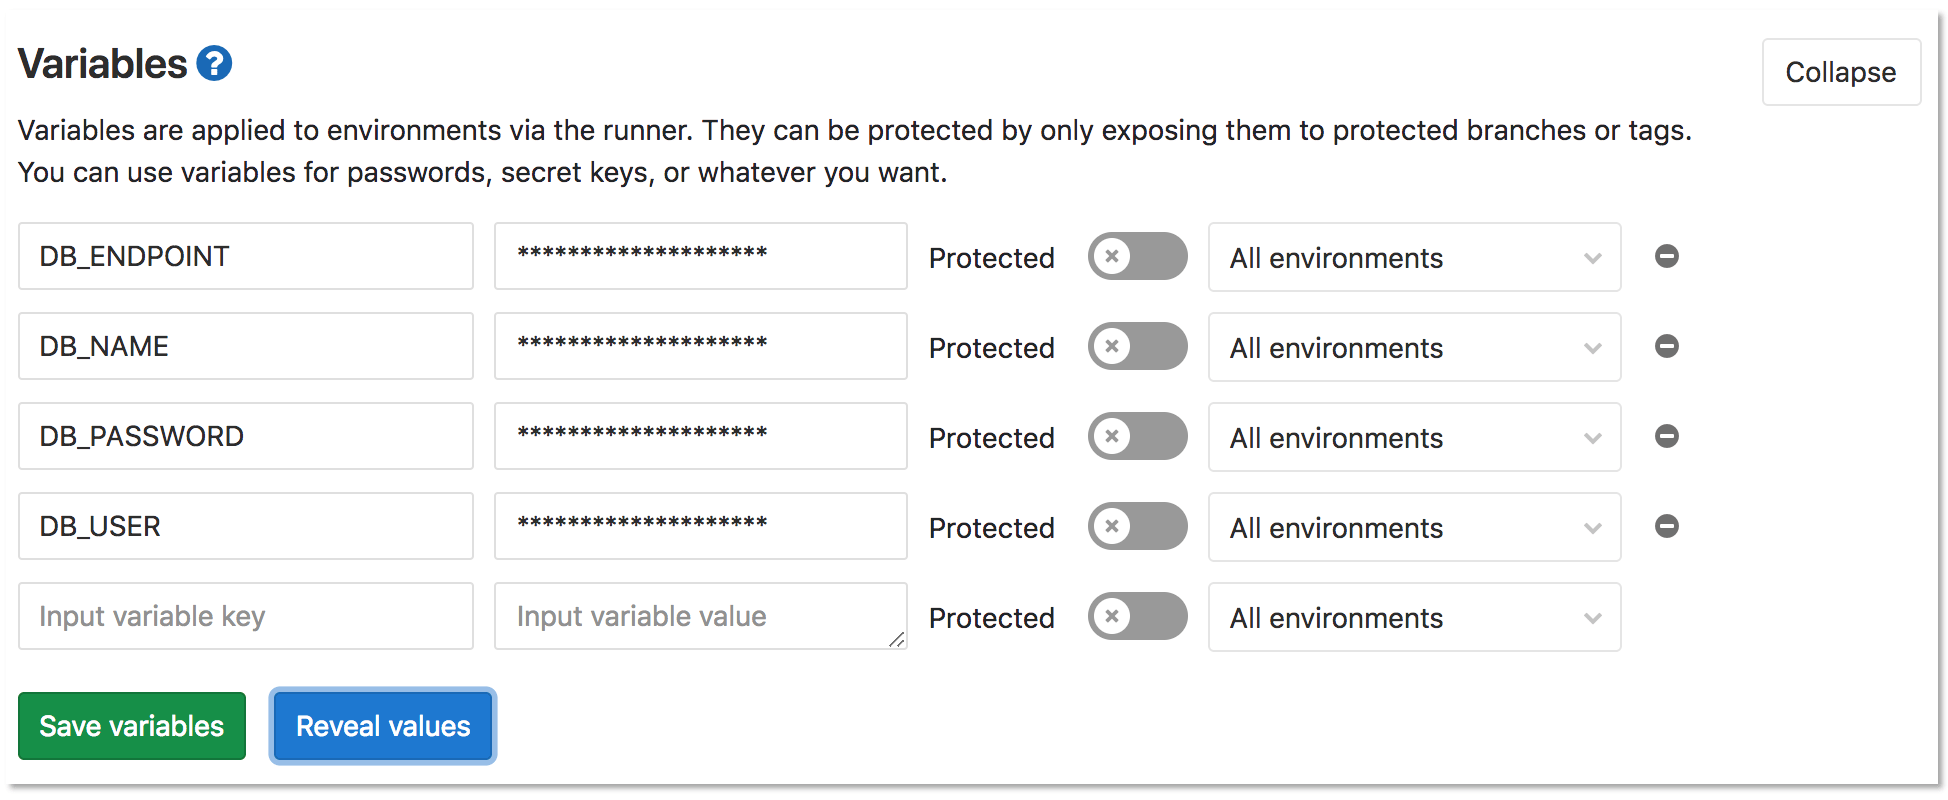
%env DB_NAME={project.variables.get('DB_NAME').value}Create the matching variables in your project's Settings >> CI/CD >> Variables
Back in Jupyter, click the "Run SQL queries in Notebook" heading and the click Run. The results will be displayed in-line as follows:
You can try other operations such as running shell scripts or interacting with a Kubernetes cluster. Visit the Nurtch Documentation for more information.