Error Tracking
Introduced in GitLab 11.8.
Error tracking allows developers to easily discover and view the errors that their application may be generating. By surfacing error information where the code is being developed, efficiency and awareness can be increased.
Sentry error tracking
Sentry is an open source error tracking system. GitLab allows administrators to connect Sentry to GitLab, to allow users to view a list of Sentry errors in GitLab.
Deploying Sentry
You may sign up to the cloud hosted https://sentry.io or deploy your own on-premise instance.
Enabling Sentry
NOTE: Note: You will need at least Maintainer permissions to enable the Sentry integration.
GitLab provides an easy way to connect Sentry to your project:
- Sign up to Sentry.io or deploy your own Sentry instance.
- Create a new Sentry project. For each GitLab project that you want to integrate, we recommend that you create a new Sentry project.
-
Find or generate a Sentry auth token for your Sentry project.
Make sure to give the token at least the following scopes:
event:readandproject:read. - Navigate to your project’s Settings > Operations.
- Ensure that the Active checkbox is set.
- In the Sentry API URL field, enter your Sentry hostname. For example,
https://sentry.example.com. - In the Auth Token field, enter the token you previously generated.
- Click the Connect button to test the connection to Sentry and populate the Project dropdown.
- From the Project dropdown, choose a Sentry project to link to your GitLab project.
- Click Save changes for the changes to take effect.
- You can now visit Operations > Error Tracking in your project's sidebar to view a list of Sentry errors.
Enabling GitLab issues links
You may also want to enable Sentry's GitLab integration by following the steps in the Sentry documentation
Error Tracking List
NOTE: Note: You will need at least Reporter permissions to view the Error Tracking list.
The Error Tracking list may be found at Operations > Error Tracking in your project's sidebar. Errors can be filtered by title or sorted by Frequency, First Seen or Last Seen. Errors are always sorted in descending order by the field specified.
![]()
Error Details
From error list, users can navigate to the error details page by clicking the title of any error.
This page has:
- A link to the Sentry issue.
- A link to the GitLab commit if the Sentry release id/version on the Sentry Issue's first release matches a commit SHA in your GitLab hosted project.
- Other details about the issue, including a full stack trace.
- In GitLab 12.7 and newer, language and urgency are displayed.
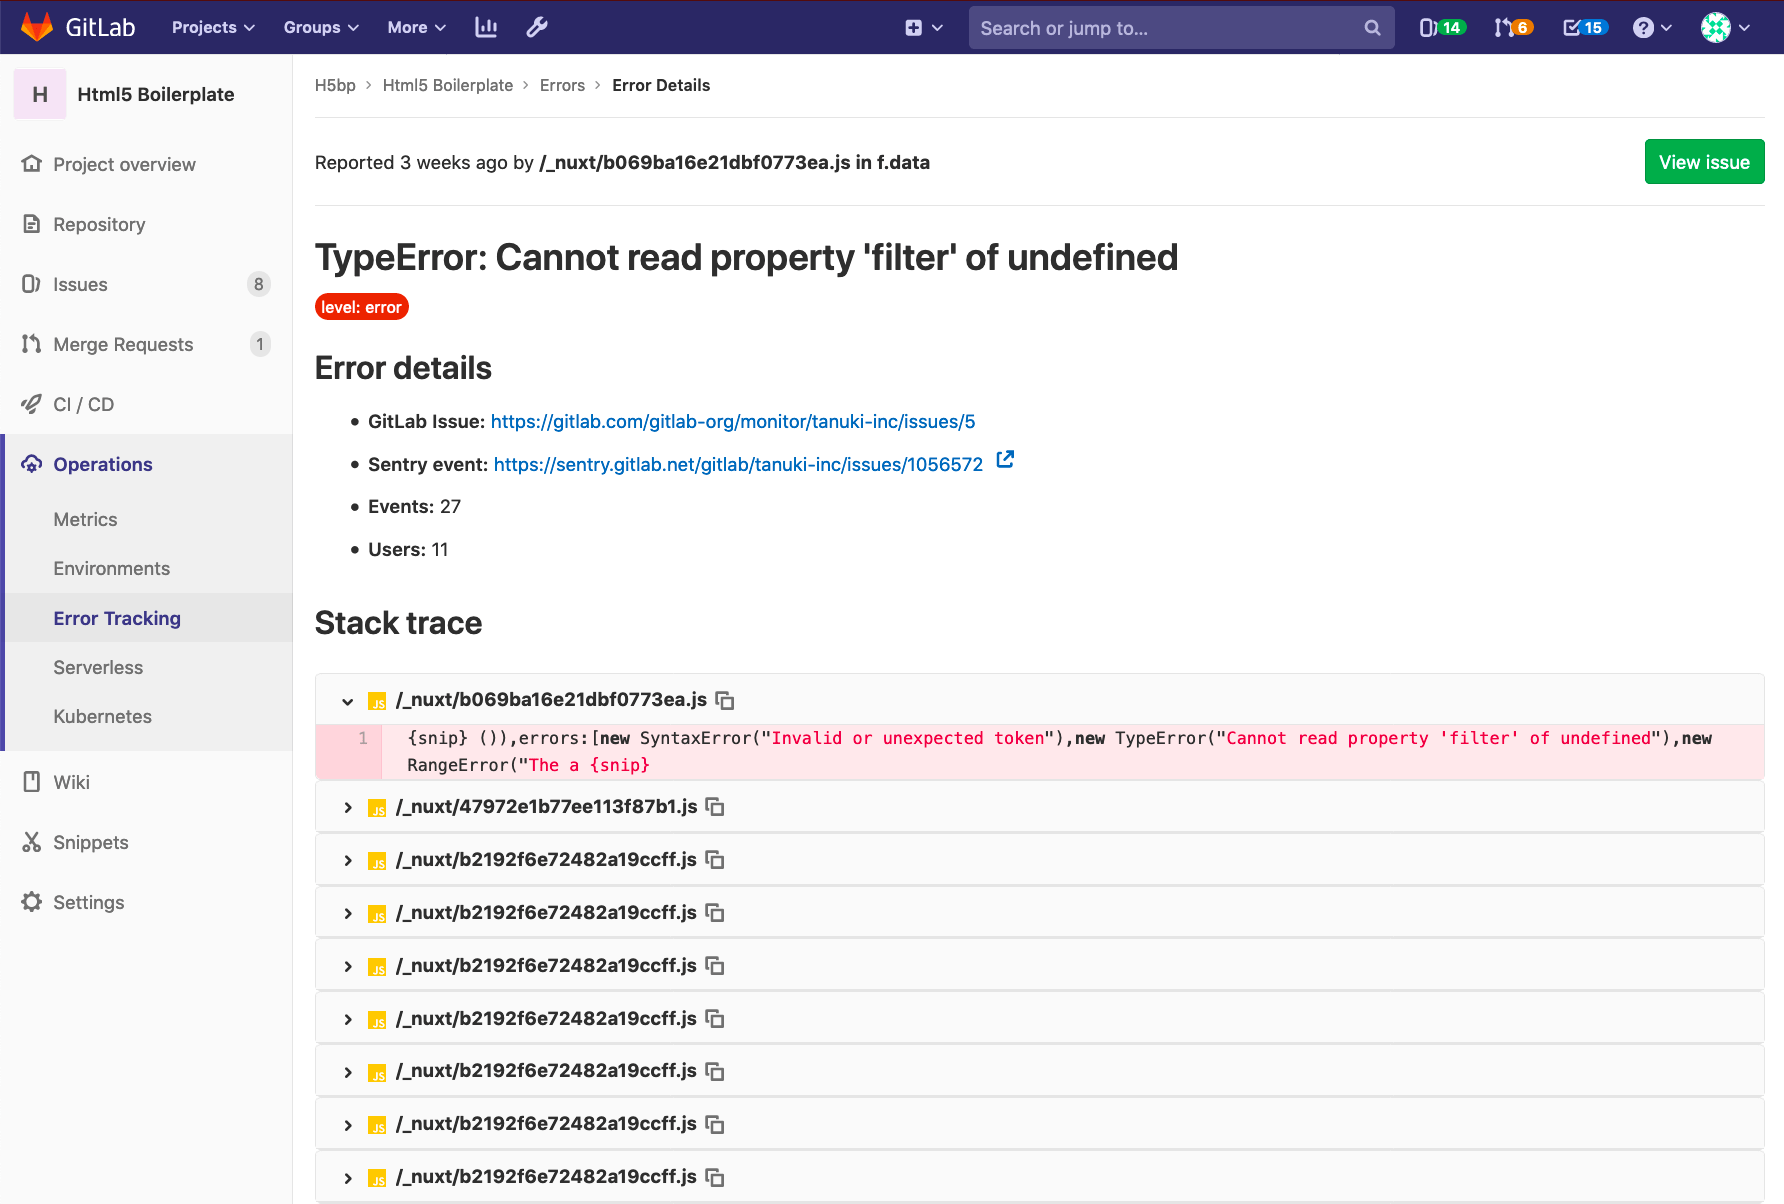
By default, a Create issue button is displayed. Once you have used it to create an issue, the button is hidden.
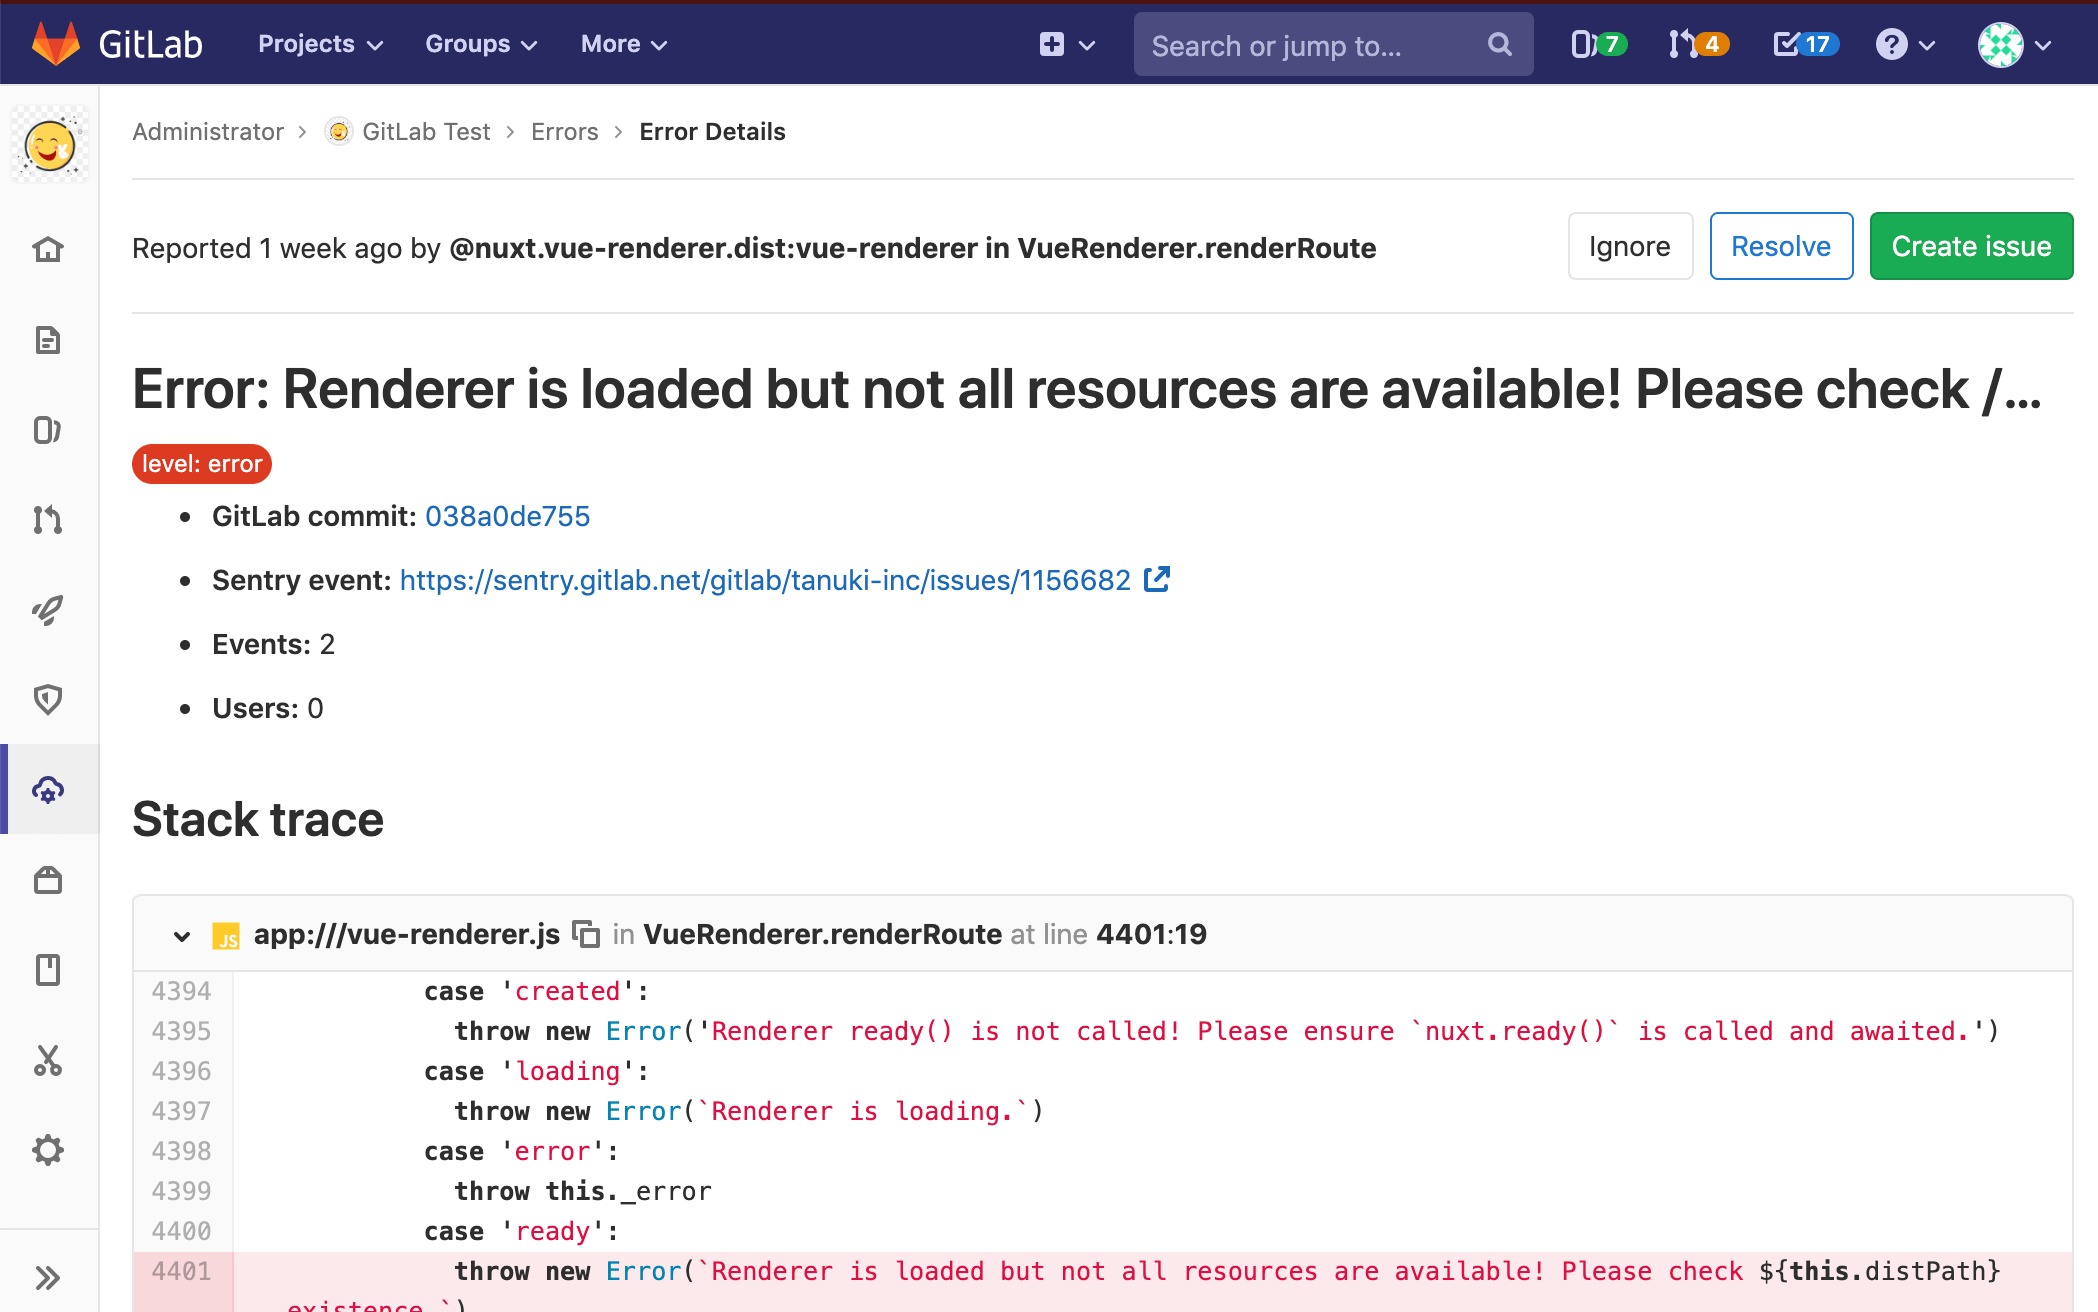
If a link does exist, it will be shown in the details and the 'Create issue' button will change to a 'View issue' button:
Taking Action on errors
You can take action on Sentry Errors from within the GitLab UI.
Ignoring errors
Introduced in GitLab 12.7.
From within the Error Details page you can ignore a Sentry error by simply clicking the Ignore button near the top of the page.
Ignoring an error will prevent it from appearing in the Error Tracking List, and will silence notifications that were set up within Sentry.
Resolving errors
Introduced in GitLab 12.7.
From within the Error Details page you can resolve a Sentry error by clicking the Resolve button near the top of the page.
Marking an error as resolved indicates that the error has stopped firing events. If another event occurs, the error reverts to unresolved.